
|
|
Artist's Tip - JPG Walls TutorialCourtesy of dreamer2 This month dreamer2 gives us a way to create multi-object jpg walls and win the battle with the ever-dreaded Building Inspector! Have patience - as this is the first tutorial I've ever typed out. What I would like to show you - is a standard aw wall that has been tiled -but with facer/sprite type objects added to it. Due to cell limits set at normal in alpha world and many private worlds - adding models to interiors and exteriors is a fight with the building inspector (BI). Many citizens have asked me how to do this - soooooo here it is. All you need is a graphic program like photoshop7 or paint shop pro7 and a steady hand. Starting out - you need a finished project (house, building , walks or walls) that you can copy (by screen shot) - I am going to use one of the aw walls as an example. A pp01.rwx (8x8 wall panel) with a create texture wall13 (log texture) in the ACTION field of the object box. By right clicking & holding down shift - the surrounding walls , floors and roofs of the pp01.rwx - the yellow (bounding box) lines show that it's selected. The reason - I don't right click on the pp01.rwx -you will get the xyz line running thru the middle of wall -(if using newer versions of aw)-- so avoid that (unless you are really good at cloning). Then I take a screen shot of it - by opening window larger - pulling chat window down - press Prt Scr key on the keyboard. It copies screen to an invisible clipboard and ready to paste (control v) into a graphic program like Paint (that comes with windows OS) - Photoshop or Paint Shop Pro. With PAINT program you don't have to open a new window - just paste (control v) but with photoshop and paint shop pro - you must open a new window to paste it there. I do keep the yellow lines around it ---for I want to use them as my guide to know where to marquis out the tiled log textured wall and copy it to a new 256x256 pixel window (or you can use a 512x512 but will be a higher file size). 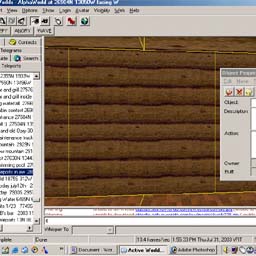 I pasted the screen shot to a 600x600 pixel window in photoshop - now it's ready to crop by using the box marquis tool - you can surround the yellow lines - and paste it to a new window that is 256 x 256. 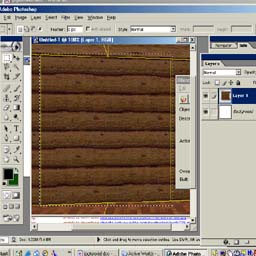 Then crop it to fit the open window. Resize to fit with scale in top tool bar menu under Edit-transform-scale to fit the new 256x256 window. 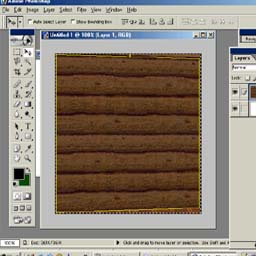 The yellow lines are still around it - and shows that I must skew the picture to make the lines disappear. That is why I like photoshop - as it has the skew feature - where I can just pull the corners up and over or down and over to resize the pict in the 256x256. It can be found in top tool bar menu - Edit -transform- skew. I saved the layered 256x256 by naming it logwallpsd.psd - as I want to add layers to it in photoshop. 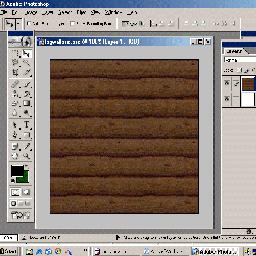 Now the yellow lines are gone and ready to add to the layers of the logwall. Depending on what you want to add to the wall - whether it's framed art or objects - the thing is - you can add whatever you want - as it won't croud cell space especially if you use remotes -(create name command) for the URL after you upload it. And it is the same tiled effect that the original wall has - as this wall is on the west side of the build - it has aw lighting and will match perfectly the wall panel next to it - and wouldn't work on the other side of build - as the aw lighting is lighter. Ready to add some other objects to the pict - which will be in layers in photoshop - each one separate - but when it's ready to save - save this file in .psd format and it will keep all the layers separate - and when finished save again as a jpg with a different name - and it's ready to upload. 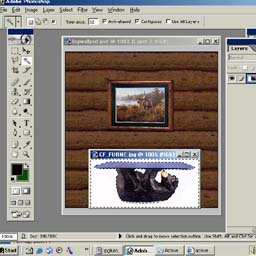 Here I have added a picture and frame. And have used the magic wand tool to select all the white around a bear coffee table - holding down shift to select white that is separate from background - then I will go to Select in top tool bar and Inverse the "marching ants" around the bear table so the table will be the only object surrounded instead of the background. Then while "marching ants are around the bear - will copy and paste to the logwall picture. 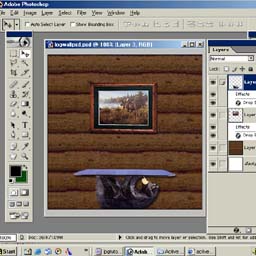 Copied with control c - pasted with control v onto the log wall and added a drop shadow to add depth. 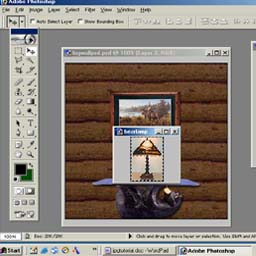 In this window with same logwall - I added a lamp - using the magic wand tool to select the outside area - and will inverse it in top tool bar - Select-Inverse. I will reverse the "marching ants to just surround the lamp instead of the outside background. Then control c to copy and control v to paste to the logwall pict. 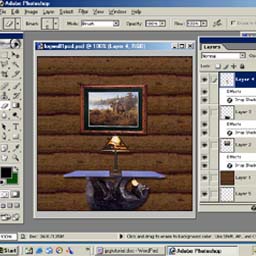 Here is the pasted lamp with a drop shadow to add depth and now I would like to add some lighting effects to the lamp - using the filters in the top tool bar - filter - Render - Lighting effects. 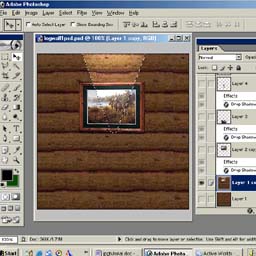 First I checked close the layers I didn't want the lighting to affect (the lamp- the bear table). Then I duplicated the logwall layer (in top tool bar Layers) and duplicated the picture frame - merged the 2 of them - and marquised out with "marching ants" with the lasso tool and added lighting effect from Filters in top tool bar - Filters - Render - Lighting effects --- default and chose spotlight - and it shows up only where I have it marquised out - now would like to do it to the bottom part of lamp. I check the lamp layer on and the bear table - so I can see where I need to marquis it out. This time I want the light to affect the bear table - so will duplicate the logwall with picture and merge them. 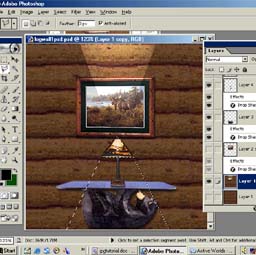 I checked off the lamp layer - just want the beartable layer and new logwall merged - so the lighting effect will only affect the wall and the beartable. Then go to Filter in top tool bar - Filter- Render - Lighting effects - using default and spotlight. Control d ---- deselects "marching ants" Saved the existing layered file as logwall1.psd in case I want to add something later :) 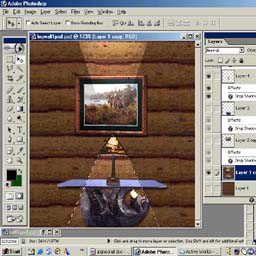 Finished project saved as logwall1.jpg 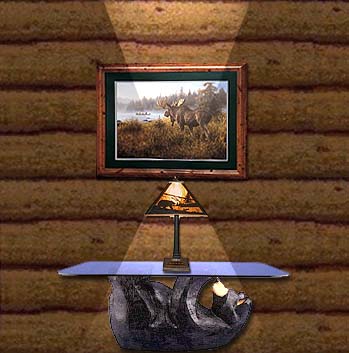 Visit Signature golf course aw 27604.33N 13504.36W 0.54a 338
|
| Active Worlds | Newsletter Home | Newsletter Archive | Contact Us | Disclaimer |