In this article we will discuss how to make a simple obelisk using Wings 3D.
Wings 3D is free software you can download at www.wings3d.com.
As you follow this tutorial look for bold words. These words indicate a critical step in completing the tutorial.

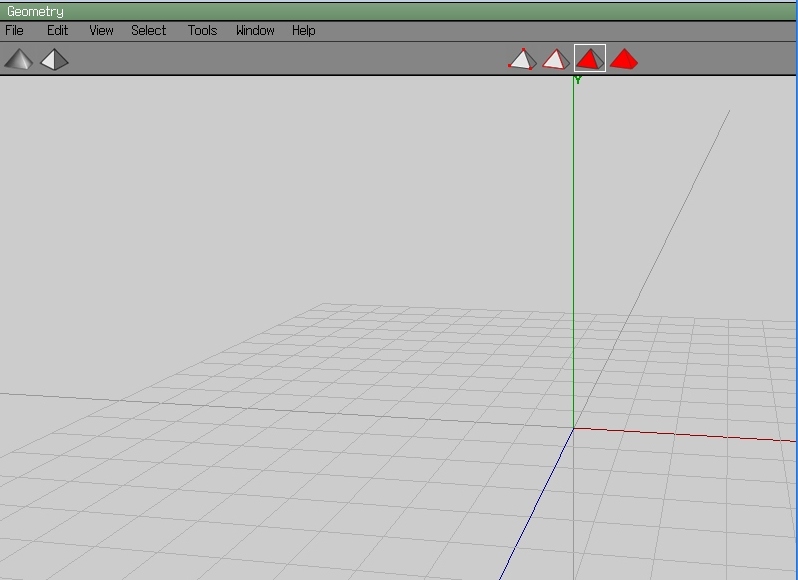
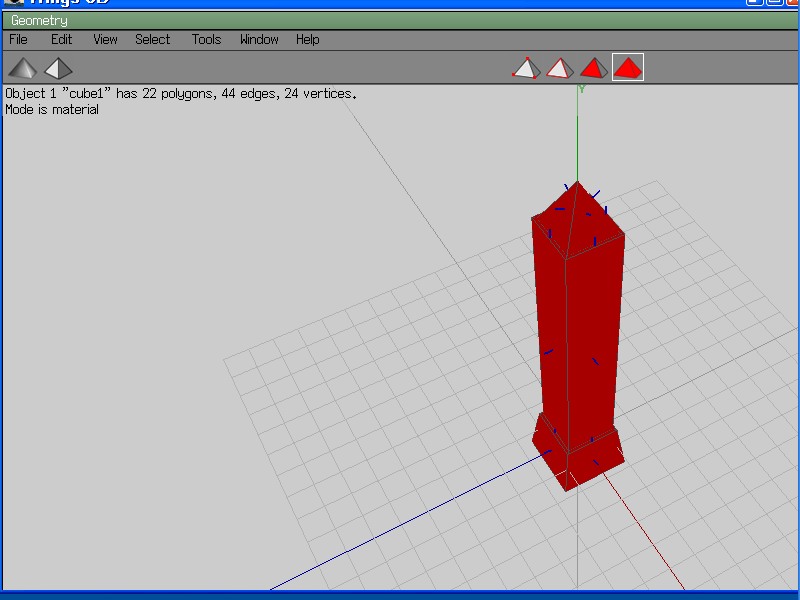
Fig. 1 Click for larger view
In Figure 1 you will notice there are 4 pyramids in the middle of the screen. Going from left to right they are; 1 the point cloud or point pyramid, 2 the line pyramid, 3 the faces pyramid, and 4 the total select pyramid.
In this discussion we will be concerned with the faces or number 3 pyramid. It is the one with a red and a gray face. Please select that pyramid. When selected it will have a white line around it as in Figure 1. You will also notice red, green and blue lines with arrows. This is the xyz axis or the triad. The last thing I want you to notice it there is a grid of square lines. This grid block is very helpful in scaling your objects. One grid square is 2 meters by 2 meters in size. Now let's make an obelisk.
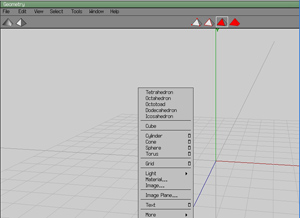
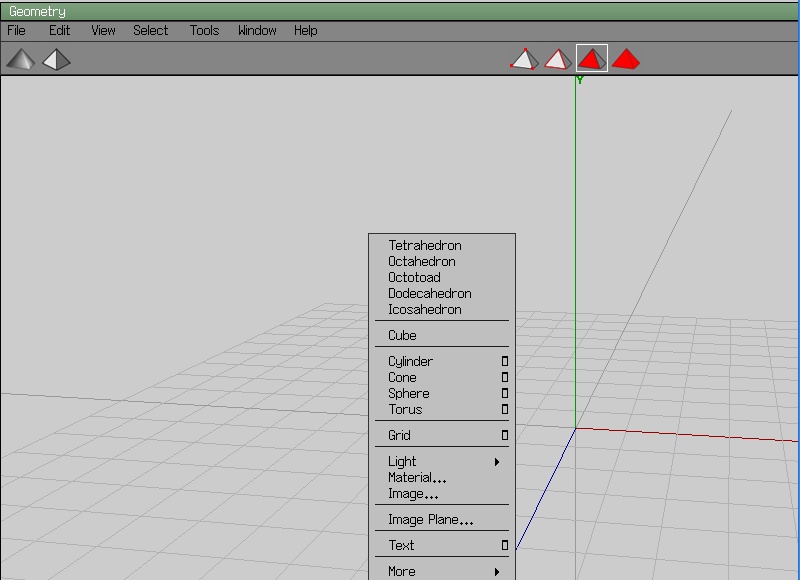
Fig. 2 Click for larger view
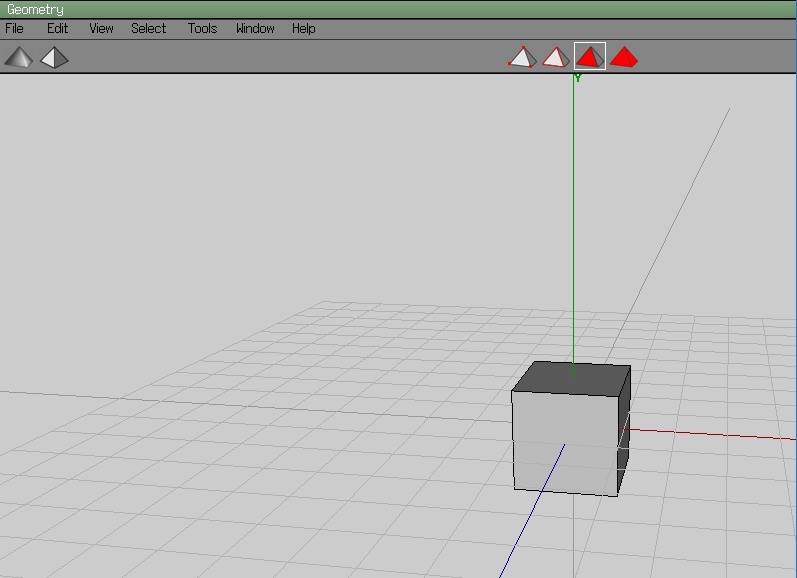
When you right-click in the screen a box will appear as seen in Figure 2. This box list all of the base objects that Wings3d can make. I want you to left-click on the word Cube and a cube will appear as seen in Figure 3.
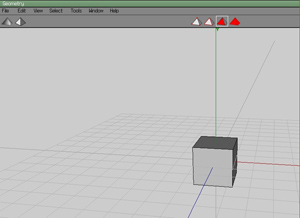
Fig. 3 Click for larger view
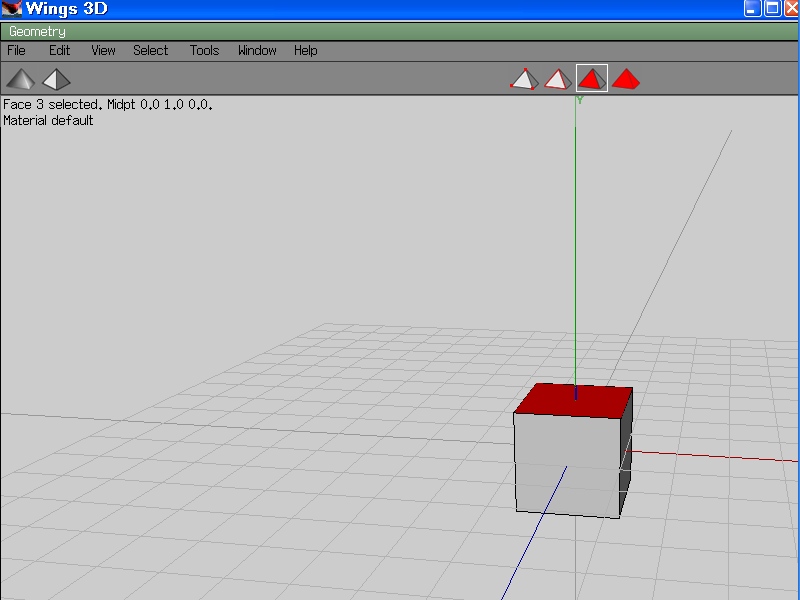
Now put your mouse arrow on the top face of the cube and left-click it. It will turn red meaning that you have selected it as shown in Figure 4.
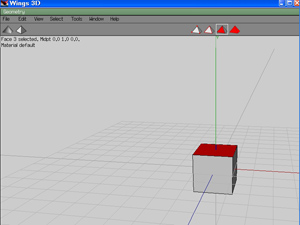
Fig. 4 Click for larger view
Now the fun begins.
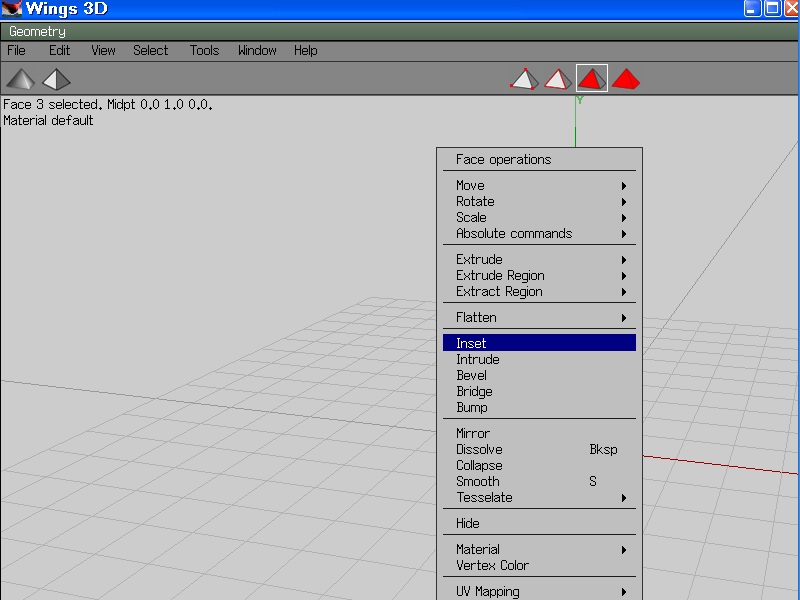
Place your mouse arrow on the red face and right-click. A box will pop up as seen in Figure 5.

Fig. 5 Click for larger view
This box has many options but the one we are looking for is Inset. Once you have selected Inset move your mouse to the right slightly and the top face will inset into itself and form a small lip as seen in Figure 6.

Fig. 6 Click for larger view
Now the next thing we do is to hit the space bar. This deselects all faces.
Next we will widen the bottom of the cube. To do this we must be able to see and select the bottom face. I want you to click your mouse wheel, that is the wheel in the middle of your mouse duh, and pull your mouse towards you. (If you don't have a scroll wheel or other middle button check your Wings 3D configurations for an alternative method).
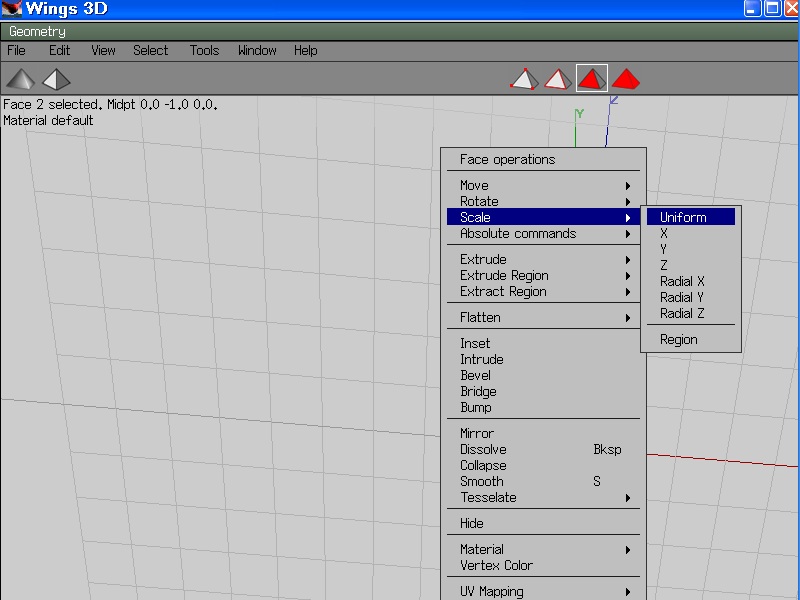
You will notice the cube moves. That is because you are in freelook mode now. When you can see the bottom of the cube, left-click and you will be out of freelook mode. Whenever you left-click Wings goes to neutral mode. Then select the bottom face as seen in Figure 7.
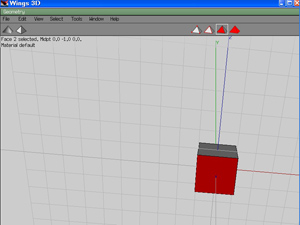
Fig. 7 Click for larger view
Put your mouse arrow on the red face and right-click and a box will come up; go to Scale and Uniform as seen in Figure 8.
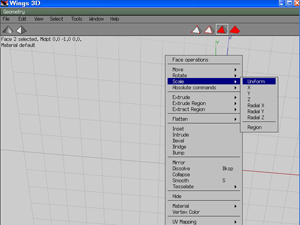
Fig. 8 Click for larger view
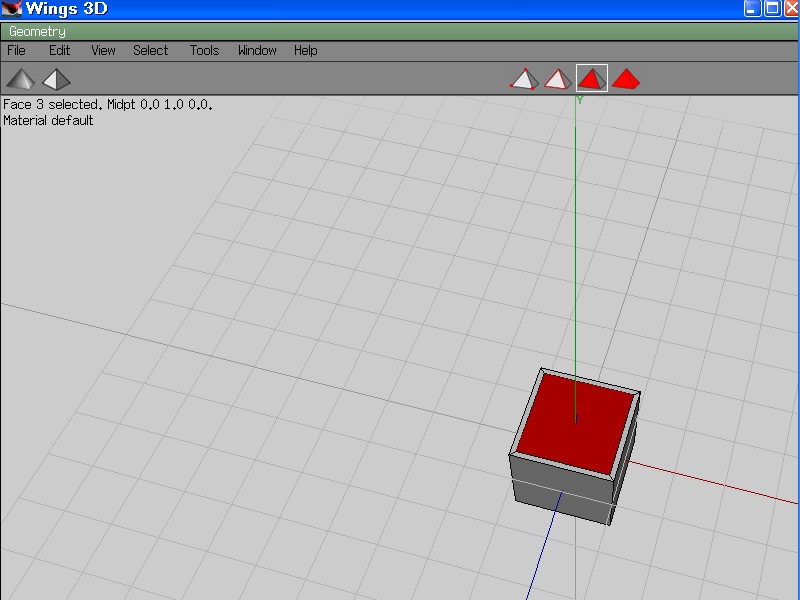
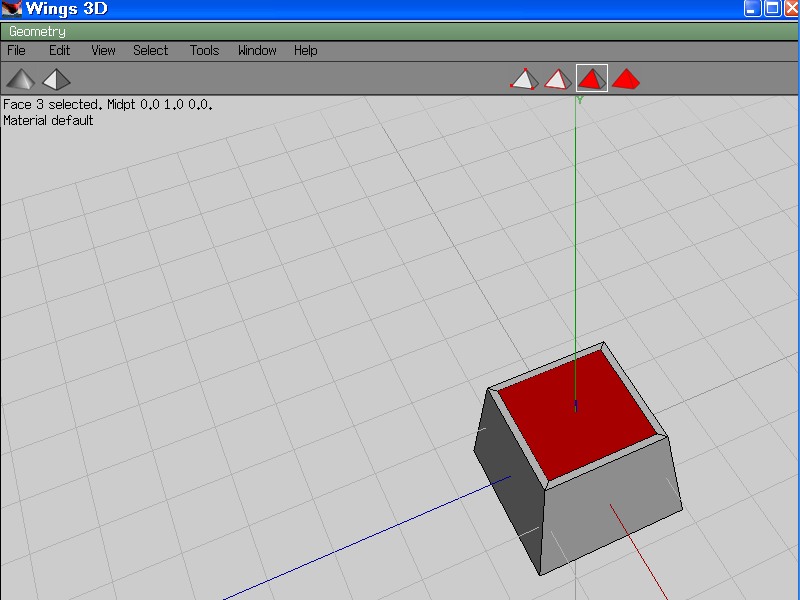
Move your mouse to the right and you will see that the base is getting wider. Yay, we have the base of our obelisk made as seen in Figure 9.
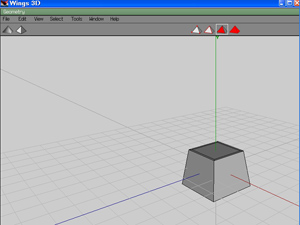
Fig. 9 Click for larger view
This is a great time to make coffee or perhaps some green tea, because now we're really gonna have some fun.

Fig. 10 Click for larger view
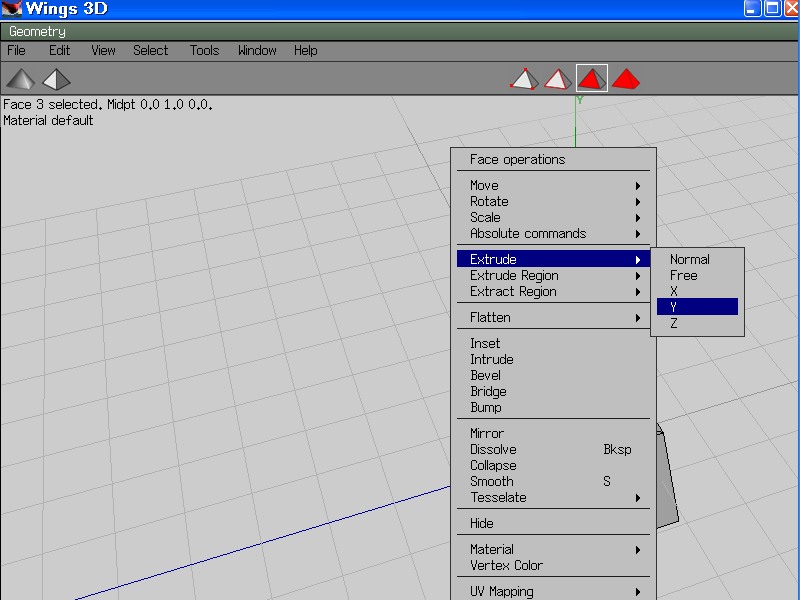
Select the top face as seen in Figure 10, right-click it and go to Extrude on the Y axis as seen in Figure 11 and move your mouse to the right.

Fig. 11 Click for larger view
You will notice the center face is moving up and getting taller as seen in Figure 12.
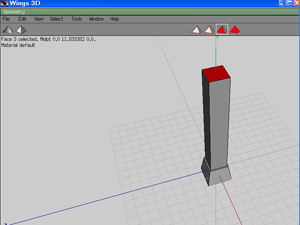
Fig. 12 Click for larger view
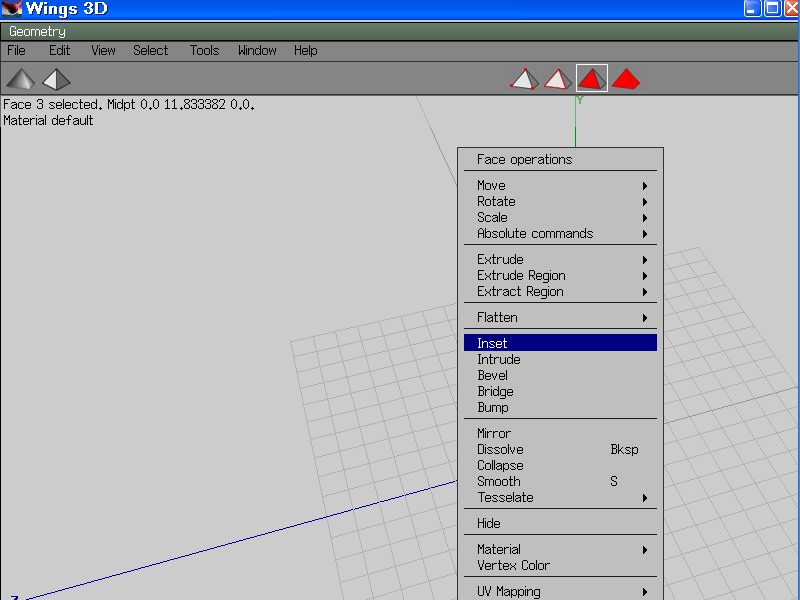
Leave the top face selected and put your mouse arrow on it and right-click. The selection box will appear; choose Inset again as seen in Figure 13.

Fig. 13 Click for larger view
Move your mouse arrow to the right and make another small lip just like we did the first time as seen in Figure 14.
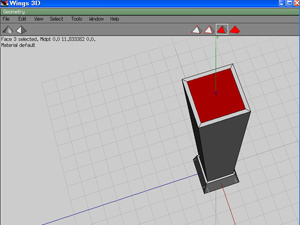
Fig. 14 Click for larger view
Leave the top face red and right-click, the selection box will appear; go to Extrude on the Y axis again. This time our aim is to make a square box as shown in Figure 15.
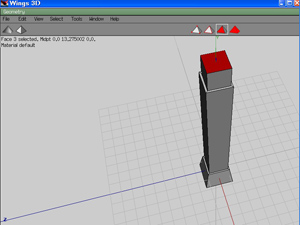
Fig. 15 Click for larger view
Now we are at our last step.
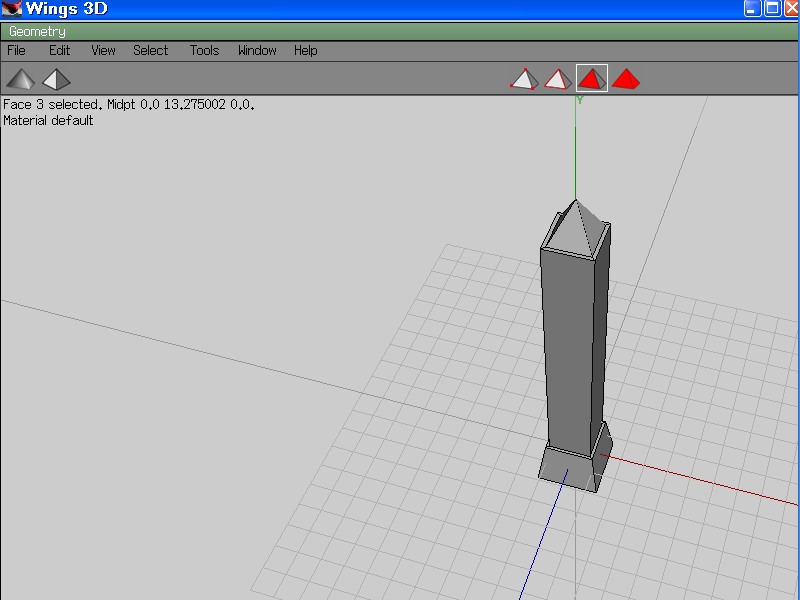
Leave the top face red, place your mouse arrow on it and go to Scale Uniform. Right-click, press the tabs key and a small box will appear with numbers in it; delete all the numbers away and put in a zero and press Enter the top will now be a pyramid shape as seen in Figure 16 and voila you have now made yourself a simple obelisk.
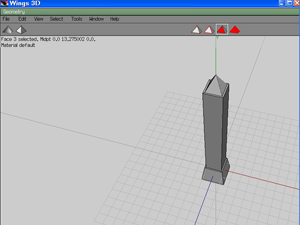
Fig. 16 Click for larger view
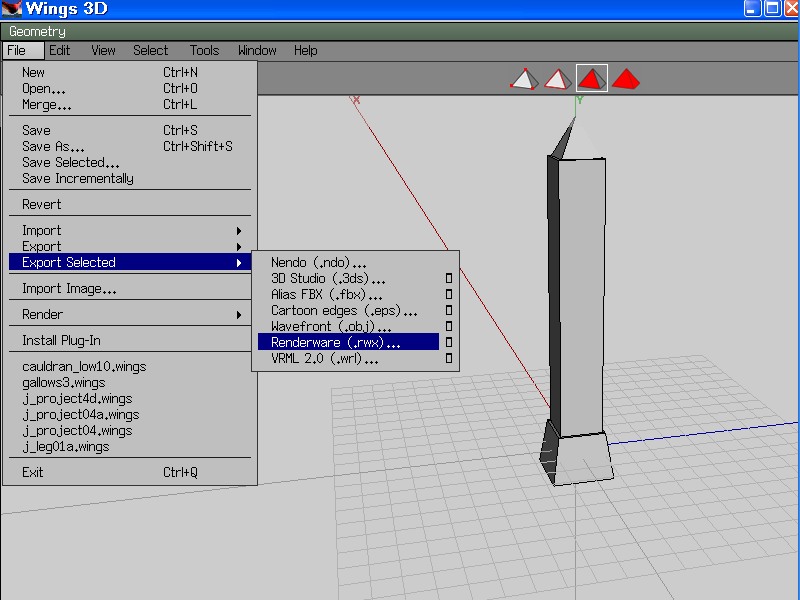
Now to save the model go to File, Export Selected, Renderware as seen in Figure 17.

Fig. 17 Click for larger view
You will now save the model to your computer after you name it. It is best to put your nickname initial and an underscore in the name such as t_obelisk01. The t in this name means TaLLan and the 01 means it is number one in the series.

Fig. 18 Click for larger view
Well Class this has been a Great Lesson, delta!!!!!!!!!!!!!!!!!!!!!!!!!!!!!!! wake up. :). Jerboa, Please shake delty and wake him up. Build Well Have Fun. TaLLan Out.
|