

In previous articles, I discussed how to size textures to quicken download time and make the smoothest experience possible for those visiting your builds. For this article I want to focus on a technique I use for making textures that add punch to low-polygon models. A well-made texture can bring so much to the table.
During a recent project, I had to recreate animals that no longer exist. Everyone loves mammoths, sabertooth tigers, and irish elks, but we don't really know what they looked like. That prompted me to do a lot of research on living animals that might be akin to the extinct ones, and also at what other artists conceived the animals looked like. That's when I stumbled on the work of one particular artist. His creations were brilliant, as much for their originality, as for their realistic feel. But what fascinated the most was the fact that he used the same method of making his pictures that I use for creating my textures, and it dawned on me, "Hey, not everyone does this!" So, why not share?
How to Build a Texture
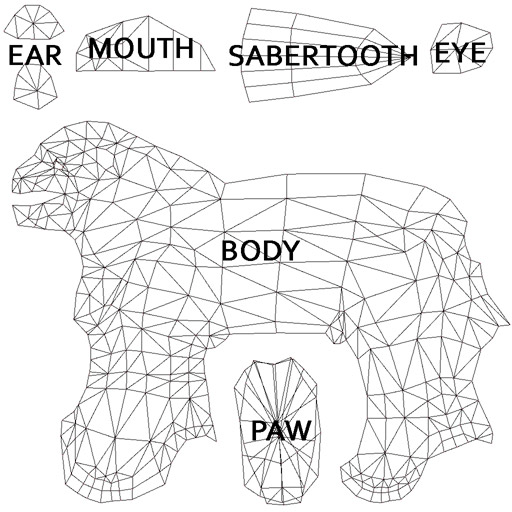
I'm going to use the Sabertooth Tiger I did as an example.
Step 1: Unwrap the model and create a UV map template.
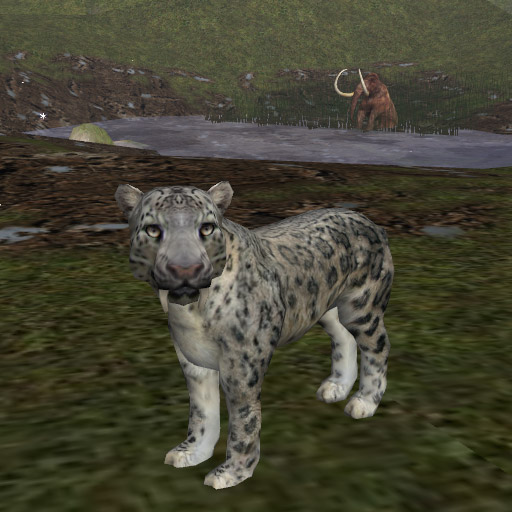
Step 2: Find photos of the type of animal(s) that you wish your model to take the characteristics of. I chose photos of snow leopards. Snow leopards have a shaggy coat that seemed perfect for an animal that lived in the cold Ice Age. Be careful about what you grab off the internet. If content is copyrighted or the author expresses a desire for it not to be copied, avoid taking or using that content. If you ever get famous for your work, the last thing you want is someone crying out, "Hey, that's from my stuff!!!" Besides, there's plenty out there that is freely available, even if it means searching a little longer. And trust me, it's worth putting a lot of time into this step. I don't know how many times I've gone through 40-50 pages of Google and found just the perfect photo on the last page. Here's the photo I used for most of the body.
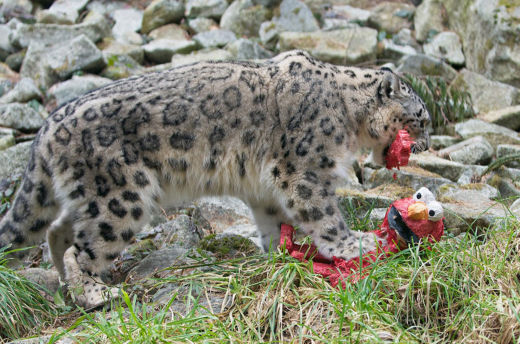
"Watch out, Grover, you're next!"
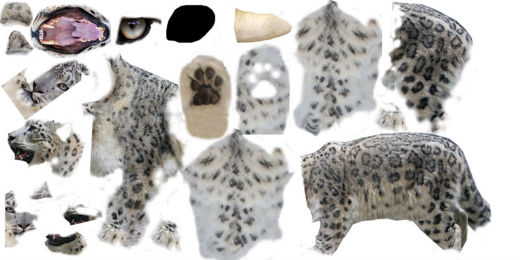
Step 3: Start cutting out pieces from your collected photos and fit them in to the UV map template for your model. Modify these pieces to fit by using whatever tools are at your disposal: clone stamp, eraser, warping, scale, rotate, skew, etc. Nothing is off limits when it comes to tools. If you're afraid of messing something up, always create a backup layer of the piece before you do any modifications, that way if things go horribly wrong, you can scrap the mistake and start clean from the original piece. Here's the pieces I cut from various photos that eventually went in to making my sabertooth tiger texture.
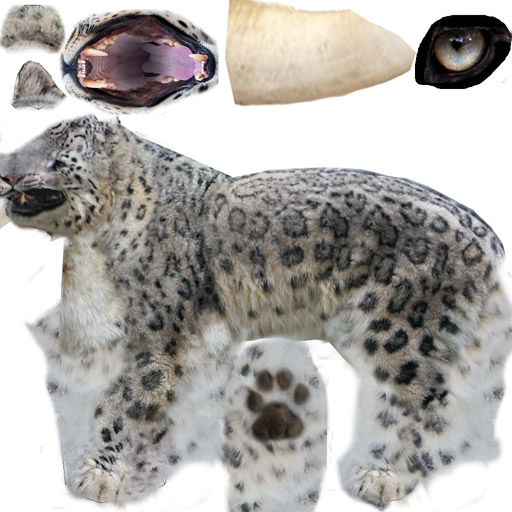
Step 4: It's okay to test the texture out on your model as you work to make sure things are lining up correctly (you know, so his eye isn't ending up on the top of his head or anything). Once you have the major pieces lined up and in place, it's time to go back and fine-tune it. Try to eliminate patterns from repeating. You'll notice that there is an unusual spot that repeats on the end of the belly, and again on the front of the back leg. Clone stamp can fix this up with a little work. This is also the time where you want to use the Burn and Dodge tools or Brightness/Contrast or Hue/Saturation settings to match up any color discrepancies between pieces taken from different photos. Also try to eliminate or soften any harsh shadows in the texture. Activeworlds' world lighting will create shadows on the model, which can cause harsh texture shadows to look too dark. Try to transition UV seams with monotone patches. In this case, I attempted to use mostly white fur on the belly and under-leg seams. Eventually, your texture should look something like this:
Step 5: Put the texture on your model and then test your model in Active Worlds. Remember, if your model isn't an avatar, make use of the "Seamless On" command in the .rwx to make a smoother transition between UV seams. Do any tweaking that you need to do until you are satisfied. Sometimes a texture will look great in Photoshop and even in your modeling program, but it will be to dark or light for Activeworlds. Adjust accordingly, because in the end, it's important it look good for the final product. This is also a time where you can put in any extra touches and details that will add umph to your texture. For me, the nose and eyes were something I focused on. When they were wrong, they made him look like a badly-made stuffed toy. When I got them right, he really came alive. And voila! We have our Sabertooth Tiger.
And if you want to check out the awesome work of the artist who creates breathtaking extinct animal pictures for museums, check out Dantheman's site:
https://dantheman9758.deviantart.com/
Dan, thanks for helping me realize the art technique I was taking for granted. May it help countless other artists. And thanks for inspiring me to go beyond the comfortable visions of others, and dare to do something different. :) Till next time, my fellow artists.